Quickstart Guide
What is better than getting into learning agents by letting them play Tic-Tac-Toe? After all, its a popcultural classic!
Setting up a Game of Tic-Tac-Toe
In palaestrAI, everything is controlled through an experiment run file, so we first need to set up one. Experiment run files define agents, environment, when episodes terminate, and so on. You can read about this further in the documentation; for now, let’s just accept the following YAML code as-is:
[1]:
ttt_run = """
uid: A Training Match of Tic-Tac-Toe
experiment_uid: Tic-Tac-Toe
seed: 234247
version: "3.5"
schedule:
  - Training:
      environments:
        - environment:
            name: palaestrai_environments.tictactoe:TicTacToeEnvironment
            uid: tttenv
            params:
              twoplayer: true
      agents:
        - &player
          name: Player 1
          brain:
            name: harl:PPOBrain
            params:
              fc_dims: [2, 1]
          muscle:
            name: harl:PPOMuscle
            params: {}
          objective:
            name: palaestrai.agent.dummy_objective:DummyObjective
            params: {}
          sensors:
            - tttenv.Tile 1-1
            - tttenv.Tile 1-2
            - tttenv.Tile 1-3
            - tttenv.Tile 2-1
            - tttenv.Tile 2-2
            - tttenv.Tile 2-3
            - tttenv.Tile 3-1
            - tttenv.Tile 3-2
            - tttenv.Tile 3-3
          actuators:
            - tttenv.Field selector
        - <<: *player
          name: Player 2
      simulation:
        name: palaestrai.simulation:TakingTurns
        conditions:
          - name: palaestrai.experiment:AgentObjectiveTerminationCondition
            params:
              "Player 1":
                brain_avg1: 10.0
              "Player 2":
                brain_avg1: 10.0
      phase_config:
        mode: train
        worker: 3
run_config:  # Not a runTIME config
  condition:
    name: palaestrai.experiment:AgentObjectiveTerminationCondition
    params:
      "Player 1":
        phase_avg10: 5.0
      "Player 2":
        phase_avg10: 5.0
"""
Creating a Results Storage Database
Later on see the results, we need to tell palaestrAI where it can store all results data. A convenient option is to use a local SQLite database, which we will enable and create here.
palaestrAI will probably tell you that using SQLite is not ideal in terms of performance. For local experiments, this doesn’t concern us, though.
[2]:
import palaestrai
rconf = palaestrai.core.RuntimeConfig()
rconf.reset()
rconf.load({"store_uri": "sqlite:///palaestrai.db"})
palaestrai.store.setup_database()
Importing from 'midas.tools.palaestrai' is deprecated! Use 'midas_palaestrai' instead!
Importing from 'midas.tools.palaestrai' is deprecated! Use 'midas_palaestrai' instead!
Could not create extension timescaledb and create hypertables: (sqlite3.OperationalError) near "EXTENSION": syntax error
[SQL: CREATE EXTENSION IF NOT EXISTS timescaledb CASCADE;]
(Background on this error at: https://sqlalche.me/e/14/e3q8). Your database setup might lead to noticeable slowdowns with larger experiment runs. Please upgrade to PostgreSQL with TimescaleDB for the best performance.
Learning the Game
Now we can execute the training run defined above. The palaestrai.execute() command accepts a list of strings as well as an io object. If strings are given, it is assumed they are paths to YAML files; io objects are considered to provide access to the contests directly. Therefore, we use io.StringIO to access our YAML document defined above.
palaestrai.execute() will now commence the training. It might take a while to run; after all, we want to traing until one of the agent avieves a consistently high average reward.
[3]:
import io
palaestrai.execute(io.StringIO(ttt_run))
Could not dump to <palaestrai.agent.store_brain_dumper.StoreBrainDumper object at 0x7fd0a19a9610>: (sqlite3.OperationalError) database is locked
[SQL: INSERT INTO brain_states (walltime, state, tag, simtime_ticks, simtime_timestamp, agent_id) VALUES (CURRENT_TIMESTAMP, ?, ?, ?, ?, ?)]
[parameters: (<memory at 0x7fd09ebb4dc0>, 'ppo_actor', None, None, 2)]
(Background on this error at: https://sqlalche.me/e/14/e3q8)
Could not dump to <palaestrai.agent.store_brain_dumper.StoreBrainDumper object at 0x7f7ff7e79670>: (sqlite3.OperationalError) database is locked
[SQL: INSERT INTO brain_states (walltime, state, tag, simtime_ticks, simtime_timestamp, agent_id) VALUES (CURRENT_TIMESTAMP, ?, ?, ?, ?, ?)]
[parameters: (<memory at 0x7f7ff5088e80>, 'ppo_actor', None, None, 1)]
(Background on this error at: https://sqlalche.me/e/14/e3q8)
Could not dump to <palaestrai.agent.store_brain_dumper.StoreBrainDumper object at 0x7fd0a19a9610>: (sqlite3.OperationalError) database is locked
[SQL: INSERT INTO brain_states (walltime, state, tag, simtime_ticks, simtime_timestamp, agent_id) VALUES (CURRENT_TIMESTAMP, ?, ?, ?, ?, ?)]
[parameters: (<memory at 0x7fd09ebb56c0>, 'ppo_critic', None, None, 2)]
(Background on this error at: https://sqlalche.me/e/14/e3q8)
Could not dump to <palaestrai.agent.store_brain_dumper.StoreBrainDumper object at 0x7f7ff7e79670>: (sqlite3.OperationalError) database is locked
[SQL: INSERT INTO brain_states (walltime, state, tag, simtime_ticks, simtime_timestamp, agent_id) VALUES (CURRENT_TIMESTAMP, ?, ?, ?, ?, ?)]
[parameters: (<memory at 0x7f7ff5089240>, 'ppo_critic', None, None, 1)]
(Background on this error at: https://sqlalche.me/e/14/e3q8)
Could not dump to <palaestrai.agent.store_brain_dumper.StoreBrainDumper object at 0x7fd0a19a9610>: (sqlite3.OperationalError) database is locked
[SQL: INSERT INTO brain_states (walltime, state, tag, simtime_ticks, simtime_timestamp, agent_id) VALUES (CURRENT_TIMESTAMP, ?, ?, ?, ?, ?)]
[parameters: (<memory at 0x7fd09ebb59c0>, 'ppo_actor', None, None, 2)]
(Background on this error at: https://sqlalche.me/e/14/e3q8)
Could not dump to <palaestrai.agent.store_brain_dumper.StoreBrainDumper object at 0x7f7ff7e79670>: (sqlite3.OperationalError) database is locked
[SQL: INSERT INTO brain_states (walltime, state, tag, simtime_ticks, simtime_timestamp, agent_id) VALUES (CURRENT_TIMESTAMP, ?, ?, ?, ?, ?)]
[parameters: (<memory at 0x7f7ff5089240>, 'ppo_actor', None, None, 1)]
(Background on this error at: https://sqlalche.me/e/14/e3q8)
Could not dump to <palaestrai.agent.store_brain_dumper.StoreBrainDumper object at 0x7fd0a19a9610>: (sqlite3.OperationalError) database is locked
[SQL: INSERT INTO brain_states (walltime, state, tag, simtime_ticks, simtime_timestamp, agent_id) VALUES (CURRENT_TIMESTAMP, ?, ?, ?, ?, ?)]
[parameters: (<memory at 0x7fd09ebb5a80>, 'ppo_critic', None, None, 2)]
(Background on this error at: https://sqlalche.me/e/14/e3q8)
Could not dump to <palaestrai.agent.store_brain_dumper.StoreBrainDumper object at 0x7f7ff7e79670>: (sqlite3.OperationalError) database is locked
[SQL: INSERT INTO brain_states (walltime, state, tag, simtime_ticks, simtime_timestamp, agent_id) VALUES (CURRENT_TIMESTAMP, ?, ?, ?, ?, ?)]
[parameters: (<memory at 0x7f7ff5089a80>, 'ppo_critic', None, None, 1)]
(Background on this error at: https://sqlalche.me/e/14/e3q8)
Could not dump to <palaestrai.agent.store_brain_dumper.StoreBrainDumper object at 0x7fd0a19a9610>: (sqlite3.OperationalError) database is locked
[SQL: INSERT INTO brain_states (walltime, state, tag, simtime_ticks, simtime_timestamp, agent_id) VALUES (CURRENT_TIMESTAMP, ?, ?, ?, ?, ?)]
[parameters: (<memory at 0x7fd09ebb4dc0>, 'ppo_actor', None, None, 2)]
(Background on this error at: https://sqlalche.me/e/14/e3q8)
Could not dump to <palaestrai.agent.store_brain_dumper.StoreBrainDumper object at 0x7f7ff7e79670>: (sqlite3.OperationalError) database is locked
[SQL: INSERT INTO brain_states (walltime, state, tag, simtime_ticks, simtime_timestamp, agent_id) VALUES (CURRENT_TIMESTAMP, ?, ?, ?, ?, ?)]
[parameters: (<memory at 0x7f7ff5089cc0>, 'ppo_actor', None, None, 1)]
(Background on this error at: https://sqlalche.me/e/14/e3q8)
Could not dump to <palaestrai.agent.store_brain_dumper.StoreBrainDumper object at 0x7fd0a19a9610>: (sqlite3.OperationalError) database is locked
[SQL: INSERT INTO brain_states (walltime, state, tag, simtime_ticks, simtime_timestamp, agent_id) VALUES (CURRENT_TIMESTAMP, ?, ?, ?, ?, ?)]
[parameters: (<memory at 0x7fd09ebb5d80>, 'ppo_critic', None, None, 2)]
(Background on this error at: https://sqlalche.me/e/14/e3q8)
Could not dump to <palaestrai.agent.store_brain_dumper.StoreBrainDumper object at 0x7f7ff7e79670>: (sqlite3.OperationalError) database is locked
[SQL: INSERT INTO brain_states (walltime, state, tag, simtime_ticks, simtime_timestamp, agent_id) VALUES (CURRENT_TIMESTAMP, ?, ?, ?, ?, ?)]
[parameters: (<memory at 0x7f7ff5089240>, 'ppo_critic', None, None, 1)]
(Background on this error at: https://sqlalche.me/e/14/e3q8)
[3]:
(['A Training Match of Tic-Tac-Toe'], <ExecutorState.EXITED: 4>)
Accessing Results
palaestrAI offers a small convenience interface to access the data most people will want to see. The functions are part of he palaestrai.store.query package:
[4]:
import palaestrai.store.query as palq
All these functions return pandas or dask dataframes, which makes them also useful in Jupyter notebooks. Let’s first see what experiments our database has logged so far (there should be only one):
[5]:
exps = palq.experiments_and_runs_configurations()
exps
[5]:
| experiment_id | experiment_name | experiment_document | experiment_run_id | experiment_run_uid | experiment_run_document | experiment_run_instance_id | experiment_run_instance_uid | experiment_run_phase_id | experiment_run_phase_uid | experiment_run_phase_mode | |
|---|---|---|---|---|---|---|---|---|---|---|---|
| 0 | 1 | Tic-Tac-Toe | None | 1 | A Training Match of Tic-Tac-Toe | {'uid': 'A Training Match of Tic-Tac-Toe', 'ex... | 1 | d64ed154-ce8f-46fa-8563-a226f4d2ff94 | 1 | Training | train |
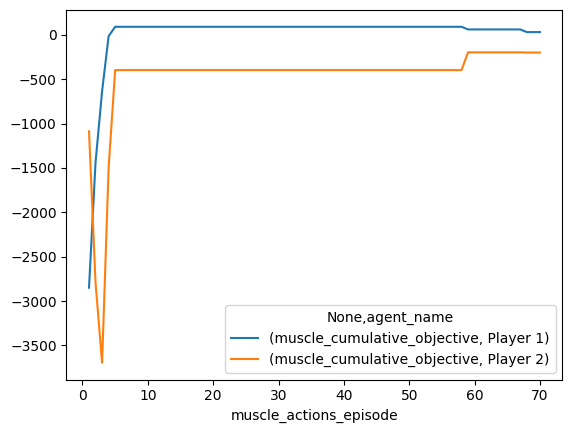
Our two agents have competed for a number of episodes. Let’s see their cumulative reward. For this, we have a query function called muscles_cumulative_objective(). Two things are of note here.
First, palaestrAI names its agents “Muscles.” This naming is in contrast to the learning part, which is named “Brain.” You’re probably asking yourself now “why the funny names?” The reason lies in palaestrAI’s architecture, which tries to hide as much of the technical details of the actual execution as possible; so an agent’s “Brain” and its “Muscles” are metaphores for the pure algorithm implementations.
Second, you might notice the function parameter like_dataframe. Almost every query function has this. It allows you to pass a dataframe for filtering; palaestrAI then constructs the underlying SQL query according to the dataframe’s columns. We’re demonstrating one possible convenient application of this here. First, we got the list of all experiments, runs, and phases in the previous cell. Now, we use pandas’ filtering to reduce the rows to those experiment runs we’re interested in. This
reduced dataframe can the be passed to our next query function: This way, we retrieve only the cumulative values for the phases we really want to analyize.
[6]:
cumobj = palq.muscles_cumulative_objective(like_dataframe=exps.iloc[[-1]])
cumobj[
    ["agent_name", "muscle_actions_episode", "muscle_cumulative_objective"]
].set_index(
    "muscle_actions_episode"
).pivot_table(
    columns=["agent_name"],
    values=["muscle_cumulative_objective"],
    index=["muscle_actions_episode"]
).plot()
[6]:
<Axes: xlabel='muscle_actions_episode'>
The Real Match
Training time is over, let’s have a real competition! We will now schedule a separate run, but no longer as training episode, but for testing. Our next experiment run definition instructs palaestrAI to load the previously trained agents. To make things interesting, we let the better player compete against itself:
[7]:
best_player = cumobj[
    ["agent_name", "muscle_cumulative_objective"]
].groupby(
    by=["agent_name"]
).sum().sort_values(
    by=["muscle_cumulative_objective"]
).index[-1]
[8]:
ttt_test = """
uid: Game of Tic-Tac-Toe
experiment_uid: Tic-Tac-Toe
seed: 234247
version: "3.5"
schedule:
  - Test:
      environments:
        - environment:
            name: palaestrai_environments.tictactoe:TicTacToeEnvironment
            uid: tttenv
            params:
              twoplayer: true
              invalid_turn_limit: -1
      agents:
        - &player
          name: Player 1
          brain:
            name: harl:PPOBrain
            params:
              fc_dims: [2, 1]
          muscle:
            name: harl:PPOMuscle
            params: {}
          objective:
            name: palaestrai.agent.dummy_objective:DummyObjective
            params: {}
          load:
            experiment_run: A Training Match of Tic-Tac-Toe
            agent: %(best_player)s
            phase: 0
          sensors:
            - tttenv.Tile 1-1
            - tttenv.Tile 1-2
            - tttenv.Tile 1-3
            - tttenv.Tile 2-1
            - tttenv.Tile 2-2
            - tttenv.Tile 2-3
            - tttenv.Tile 3-1
            - tttenv.Tile 3-2
            - tttenv.Tile 3-3
          actuators:
            - tttenv.Field selector
        - <<: *player
          name: Player 2
          load:
            experiment_run: A Training Match of Tic-Tac-Toe
            agent: %(best_player)s
            phase: 0
      simulation:
        name: palaestrai.simulation:TakingTurns
        conditions:
          - name: palaestrai.experiment:EnvironmentTerminationCondition
            params: {}
      phase_config:
        mode: test
        worker: 1
        episodes: 1
run_config:  # Not a runTIME config
  condition:
    name: palaestrai.experiment:VanillaRunGovernorTerminationCondition
    params: {}

""" % {"best_player": best_player}
[9]:
palaestrai.execute(io.StringIO(ttt_test))
[9]:
(['Game of Tic-Tac-Toe'], <ExecutorState.EXITED: 4>)
After we’re done, let’s examine the list of experiment runs again. We can now filter for test runs:
[10]:
exps = palq.experiments_and_runs_configurations()
exps[(exps.experiment_name == "Tic-Tac-Toe") & (exps.experiment_run_phase_mode == "test")]
[10]:
| experiment_id | experiment_name | experiment_document | experiment_run_id | experiment_run_uid | experiment_run_document | experiment_run_instance_id | experiment_run_instance_uid | experiment_run_phase_id | experiment_run_phase_uid | experiment_run_phase_mode | |
|---|---|---|---|---|---|---|---|---|---|---|---|
| 1 | 1 | Tic-Tac-Toe | None | 2 | Game of Tic-Tac-Toe | {'uid': 'Game of Tic-Tac-Toe', 'experiment_uid... | 2 | d11b4a34-6507-4e4f-94fb-dcca264a7976 | 2 | Test | test |
This time, we’re not after cumulative scores as we’ve instructed palaestrAI to play one match only. Let’s get the individual moves of each player. We’re using the muscle_actions() query function now. Like any other query function, we can pass it a dataframe with values we want to query (via the like_dataframe parameter). In this case, we’re interested only in the actions of the test run, so let’s use pandas’ filtering capabilities:
[11]:
ma = palq.muscle_actions(
    like_dataframe=exps[(exps.experiment_name == "Tic-Tac-Toe") & (exps.experiment_run_phase_mode == "test")].iloc[[-1]])
ma
[11]:
| muscle_action_walltime | muscle_action_simtimes | rollout_worker_uid | muscle_sensor_readings | muscle_actuator_setpoints | muscle_action_rewards | muscle_action_objective | muscle_action_done | agent_id | agent_uid | agent_name | experiment_run_phase_id | experiment_run_phase_uid | experiment_run_phase_configuration | experiment_run_instance_uid | experiment_run_id | experiment_run_uid | experiment_id | experiment_name | |
|---|---|---|---|---|---|---|---|---|---|---|---|---|---|---|---|---|---|---|---|
| muscle_action_id | |||||||||||||||||||
| 1052 | 2025-04-26 21:39:51.236292 | {'tttenv': {'simtime_ticks': 0, 'simtime_times... | AgentConductor-d4d27e.Player 1-fbba4f | [SensorInformation(value=0, space=Discrete(3),... | [ActuatorInformation(value=2, space=Discrete(9... | [RewardInformation(value=[1.], space=Box(low=[... | 1.0 | False | 3 | AgentConductor-d4d27e | Player 1 | 2 | Test | {'mode': 'test', 'worker': 1, 'episodes': 1} | d11b4a34-6507-4e4f-94fb-dcca264a7976 | 2 | Game of Tic-Tac-Toe | 1 | Tic-Tac-Toe |
| 1053 | 2025-04-26 21:39:51.313104 | {'tttenv': {'simtime_ticks': 1, 'simtime_times... | AgentConductor-251a3b.Player 2-a9c664 | [SensorInformation(value=0, space=Discrete(3),... | [ActuatorInformation(value=0, space=Discrete(9... | [RewardInformation(value=[1.], space=Box(low=[... | 1.0 | False | 4 | AgentConductor-251a3b | Player 2 | 2 | Test | {'mode': 'test', 'worker': 1, 'episodes': 1} | d11b4a34-6507-4e4f-94fb-dcca264a7976 | 2 | Game of Tic-Tac-Toe | 1 | Tic-Tac-Toe |
| 1054 | 2025-04-26 21:39:51.377685 | {'tttenv': {'simtime_ticks': 2, 'simtime_times... | AgentConductor-d4d27e.Player 1-fbba4f | [SensorInformation(value=1, space=Discrete(3),... | [ActuatorInformation(value=6, space=Discrete(9... | [RewardInformation(value=[1.], space=Box(low=[... | 1.0 | False | 3 | AgentConductor-d4d27e | Player 1 | 2 | Test | {'mode': 'test', 'worker': 1, 'episodes': 1} | d11b4a34-6507-4e4f-94fb-dcca264a7976 | 2 | Game of Tic-Tac-Toe | 1 | Tic-Tac-Toe |
| 1055 | 2025-04-26 21:39:51.431586 | {'tttenv': {'simtime_ticks': 3, 'simtime_times... | AgentConductor-251a3b.Player 2-a9c664 | [SensorInformation(value=1, space=Discrete(3),... | [ActuatorInformation(value=1, space=Discrete(9... | [RewardInformation(value=[1.], space=Box(low=[... | 1.0 | False | 4 | AgentConductor-251a3b | Player 2 | 2 | Test | {'mode': 'test', 'worker': 1, 'episodes': 1} | d11b4a34-6507-4e4f-94fb-dcca264a7976 | 2 | Game of Tic-Tac-Toe | 1 | Tic-Tac-Toe |
| 1056 | 2025-04-26 21:39:51.478556 | {'tttenv': {'simtime_ticks': 4, 'simtime_times... | AgentConductor-d4d27e.Player 1-fbba4f | [SensorInformation(value=1, space=Discrete(3),... | [ActuatorInformation(value=8, space=Discrete(9... | [RewardInformation(value=[1.], space=Box(low=[... | 1.0 | False | 3 | AgentConductor-d4d27e | Player 1 | 2 | Test | {'mode': 'test', 'worker': 1, 'episodes': 1} | d11b4a34-6507-4e4f-94fb-dcca264a7976 | 2 | Game of Tic-Tac-Toe | 1 | Tic-Tac-Toe |
| 1057 | 2025-04-26 21:39:51.572816 | {'tttenv': {'simtime_ticks': 5, 'simtime_times... | AgentConductor-251a3b.Player 2-a9c664 | [SensorInformation(value=1, space=Discrete(3),... | [ActuatorInformation(value=7, space=Discrete(9... | [RewardInformation(value=[1.], space=Box(low=[... | 1.0 | False | 4 | AgentConductor-251a3b | Player 2 | 2 | Test | {'mode': 'test', 'worker': 1, 'episodes': 1} | d11b4a34-6507-4e4f-94fb-dcca264a7976 | 2 | Game of Tic-Tac-Toe | 1 | Tic-Tac-Toe |
| 1058 | 2025-04-26 21:39:51.635500 | {'tttenv': {'simtime_ticks': 6, 'simtime_times... | AgentConductor-d4d27e.Player 1-fbba4f | [SensorInformation(value=1, space=Discrete(3),... | [ActuatorInformation(value=6, space=Discrete(9... | [RewardInformation(value=[-100.], space=Box(lo... | -100.0 | False | 3 | AgentConductor-d4d27e | Player 1 | 2 | Test | {'mode': 'test', 'worker': 1, 'episodes': 1} | d11b4a34-6507-4e4f-94fb-dcca264a7976 | 2 | Game of Tic-Tac-Toe | 1 | Tic-Tac-Toe |
| 1059 | 2025-04-26 21:39:51.682877 | {'tttenv': {'simtime_ticks': 7, 'simtime_times... | AgentConductor-251a3b.Player 2-a9c664 | [SensorInformation(value=1, space=Discrete(3),... | [ActuatorInformation(value=0, space=Discrete(9... | [RewardInformation(value=[-100.], space=Box(lo... | -100.0 | False | 4 | AgentConductor-251a3b | Player 2 | 2 | Test | {'mode': 'test', 'worker': 1, 'episodes': 1} | d11b4a34-6507-4e4f-94fb-dcca264a7976 | 2 | Game of Tic-Tac-Toe | 1 | Tic-Tac-Toe |
| 1060 | 2025-04-26 21:39:51.726250 | {'tttenv': {'simtime_ticks': 8, 'simtime_times... | AgentConductor-d4d27e.Player 1-fbba4f | [SensorInformation(value=1, space=Discrete(3),... | [ActuatorInformation(value=1, space=Discrete(9... | [RewardInformation(value=[-100.], space=Box(lo... | -100.0 | False | 3 | AgentConductor-d4d27e | Player 1 | 2 | Test | {'mode': 'test', 'worker': 1, 'episodes': 1} | d11b4a34-6507-4e4f-94fb-dcca264a7976 | 2 | Game of Tic-Tac-Toe | 1 | Tic-Tac-Toe |
| 1061 | 2025-04-26 21:39:51.763554 | {'tttenv': {'simtime_ticks': 9, 'simtime_times... | AgentConductor-251a3b.Player 2-a9c664 | [SensorInformation(value=1, space=Discrete(3),... | [ActuatorInformation(value=5, space=Discrete(9... | [RewardInformation(value=[1.], space=Box(low=[... | 1.0 | False | 4 | AgentConductor-251a3b | Player 2 | 2 | Test | {'mode': 'test', 'worker': 1, 'episodes': 1} | d11b4a34-6507-4e4f-94fb-dcca264a7976 | 2 | Game of Tic-Tac-Toe | 1 | Tic-Tac-Toe |
| 1062 | 2025-04-26 21:39:51.803152 | {'tttenv': {'simtime_ticks': 10, 'simtime_time... | AgentConductor-d4d27e.Player 1-fbba4f | [SensorInformation(value=1, space=Discrete(3),... | [ActuatorInformation(value=2, space=Discrete(9... | [RewardInformation(value=[-100.], space=Box(lo... | -100.0 | False | 3 | AgentConductor-d4d27e | Player 1 | 2 | Test | {'mode': 'test', 'worker': 1, 'episodes': 1} | d11b4a34-6507-4e4f-94fb-dcca264a7976 | 2 | Game of Tic-Tac-Toe | 1 | Tic-Tac-Toe |
| 1063 | 2025-04-26 21:39:51.843948 | {'tttenv': {'simtime_ticks': 11, 'simtime_time... | AgentConductor-251a3b.Player 2-a9c664 | [SensorInformation(value=1, space=Discrete(3),... | [ActuatorInformation(value=7, space=Discrete(9... | [RewardInformation(value=[-100.], space=Box(lo... | -100.0 | False | 4 | AgentConductor-251a3b | Player 2 | 2 | Test | {'mode': 'test', 'worker': 1, 'episodes': 1} | d11b4a34-6507-4e4f-94fb-dcca264a7976 | 2 | Game of Tic-Tac-Toe | 1 | Tic-Tac-Toe |
| 1064 | 2025-04-26 21:39:51.881714 | {'tttenv': {'simtime_ticks': 12, 'simtime_time... | AgentConductor-d4d27e.Player 1-fbba4f | [SensorInformation(value=1, space=Discrete(3),... | [ActuatorInformation(value=2, space=Discrete(9... | [RewardInformation(value=[-100.], space=Box(lo... | -100.0 | False | 3 | AgentConductor-d4d27e | Player 1 | 2 | Test | {'mode': 'test', 'worker': 1, 'episodes': 1} | d11b4a34-6507-4e4f-94fb-dcca264a7976 | 2 | Game of Tic-Tac-Toe | 1 | Tic-Tac-Toe |
| 1065 | 2025-04-26 21:39:51.913860 | {'tttenv': {'simtime_ticks': 13, 'simtime_time... | AgentConductor-251a3b.Player 2-a9c664 | [SensorInformation(value=1, space=Discrete(3),... | [ActuatorInformation(value=0, space=Discrete(9... | [RewardInformation(value=[-100.], space=Box(lo... | -100.0 | False | 4 | AgentConductor-251a3b | Player 2 | 2 | Test | {'mode': 'test', 'worker': 1, 'episodes': 1} | d11b4a34-6507-4e4f-94fb-dcca264a7976 | 2 | Game of Tic-Tac-Toe | 1 | Tic-Tac-Toe |
| 1066 | 2025-04-26 21:39:51.948376 | {'tttenv': {'simtime_ticks': 14, 'simtime_time... | AgentConductor-d4d27e.Player 1-fbba4f | [SensorInformation(value=1, space=Discrete(3),... | [ActuatorInformation(value=2, space=Discrete(9... | [RewardInformation(value=[-100.], space=Box(lo... | -100.0 | False | 3 | AgentConductor-d4d27e | Player 1 | 2 | Test | {'mode': 'test', 'worker': 1, 'episodes': 1} | d11b4a34-6507-4e4f-94fb-dcca264a7976 | 2 | Game of Tic-Tac-Toe | 1 | Tic-Tac-Toe |
| 1067 | 2025-04-26 21:39:51.980944 | {'tttenv': {'simtime_ticks': 15, 'simtime_time... | AgentConductor-251a3b.Player 2-a9c664 | [SensorInformation(value=1, space=Discrete(3),... | [ActuatorInformation(value=2, space=Discrete(9... | [RewardInformation(value=[-100.], space=Box(lo... | -100.0 | False | 4 | AgentConductor-251a3b | Player 2 | 2 | Test | {'mode': 'test', 'worker': 1, 'episodes': 1} | d11b4a34-6507-4e4f-94fb-dcca264a7976 | 2 | Game of Tic-Tac-Toe | 1 | Tic-Tac-Toe |
| 1068 | 2025-04-26 21:39:52.045097 | {'tttenv': {'simtime_ticks': 16, 'simtime_time... | AgentConductor-d4d27e.Player 1-fbba4f | [SensorInformation(value=1, space=Discrete(3),... | [ActuatorInformation(value=5, space=Discrete(9... | [RewardInformation(value=[-100.], space=Box(lo... | -100.0 | False | 3 | AgentConductor-d4d27e | Player 1 | 2 | Test | {'mode': 'test', 'worker': 1, 'episodes': 1} | d11b4a34-6507-4e4f-94fb-dcca264a7976 | 2 | Game of Tic-Tac-Toe | 1 | Tic-Tac-Toe |
| 1069 | 2025-04-26 21:39:52.078511 | {'tttenv': {'simtime_ticks': 17, 'simtime_time... | AgentConductor-251a3b.Player 2-a9c664 | [SensorInformation(value=1, space=Discrete(3),... | [ActuatorInformation(value=2, space=Discrete(9... | [RewardInformation(value=[-100.], space=Box(lo... | -100.0 | False | 4 | AgentConductor-251a3b | Player 2 | 2 | Test | {'mode': 'test', 'worker': 1, 'episodes': 1} | d11b4a34-6507-4e4f-94fb-dcca264a7976 | 2 | Game of Tic-Tac-Toe | 1 | Tic-Tac-Toe |
| 1070 | 2025-04-26 21:39:52.228608 | {'tttenv': {'simtime_ticks': 18, 'simtime_time... | AgentConductor-d4d27e.Player 1-fbba4f | [SensorInformation(value=1, space=Discrete(3),... | [ActuatorInformation(value=6, space=Discrete(9... | [RewardInformation(value=[-100.], space=Box(lo... | -100.0 | False | 3 | AgentConductor-d4d27e | Player 1 | 2 | Test | {'mode': 'test', 'worker': 1, 'episodes': 1} | d11b4a34-6507-4e4f-94fb-dcca264a7976 | 2 | Game of Tic-Tac-Toe | 1 | Tic-Tac-Toe |
| 1071 | 2025-04-26 21:39:52.260869 | {'tttenv': {'simtime_ticks': 19, 'simtime_time... | AgentConductor-251a3b.Player 2-a9c664 | [SensorInformation(value=1, space=Discrete(3),... | [ActuatorInformation(value=1, space=Discrete(9... | [RewardInformation(value=[-100.], space=Box(lo... | -100.0 | False | 4 | AgentConductor-251a3b | Player 2 | 2 | Test | {'mode': 'test', 'worker': 1, 'episodes': 1} | d11b4a34-6507-4e4f-94fb-dcca264a7976 | 2 | Game of Tic-Tac-Toe | 1 | Tic-Tac-Toe |
| 1072 | 2025-04-26 21:39:52.295799 | {'tttenv': {'simtime_ticks': 20, 'simtime_time... | AgentConductor-d4d27e.Player 1-fbba4f | [SensorInformation(value=1, space=Discrete(3),... | [ActuatorInformation(value=0, space=Discrete(9... | [RewardInformation(value=[-100.], space=Box(lo... | -100.0 | False | 3 | AgentConductor-d4d27e | Player 1 | 2 | Test | {'mode': 'test', 'worker': 1, 'episodes': 1} | d11b4a34-6507-4e4f-94fb-dcca264a7976 | 2 | Game of Tic-Tac-Toe | 1 | Tic-Tac-Toe |
| 1073 | 2025-04-26 21:39:52.333874 | {'tttenv': {'simtime_ticks': 21, 'simtime_time... | AgentConductor-251a3b.Player 2-a9c664 | [SensorInformation(value=1, space=Discrete(3),... | [ActuatorInformation(value=6, space=Discrete(9... | [RewardInformation(value=[-100.], space=Box(lo... | -100.0 | False | 4 | AgentConductor-251a3b | Player 2 | 2 | Test | {'mode': 'test', 'worker': 1, 'episodes': 1} | d11b4a34-6507-4e4f-94fb-dcca264a7976 | 2 | Game of Tic-Tac-Toe | 1 | Tic-Tac-Toe |
| 1074 | 2025-04-26 21:39:52.442603 | {'tttenv': {'simtime_ticks': 22, 'simtime_time... | AgentConductor-d4d27e.Player 1-fbba4f | [SensorInformation(value=1, space=Discrete(3),... | [ActuatorInformation(value=1, space=Discrete(9... | [RewardInformation(value=[-100.], space=Box(lo... | -100.0 | False | 3 | AgentConductor-d4d27e | Player 1 | 2 | Test | {'mode': 'test', 'worker': 1, 'episodes': 1} | d11b4a34-6507-4e4f-94fb-dcca264a7976 | 2 | Game of Tic-Tac-Toe | 1 | Tic-Tac-Toe |
| 1075 | 2025-04-26 21:39:52.482419 | {'tttenv': {'simtime_ticks': 23, 'simtime_time... | AgentConductor-251a3b.Player 2-a9c664 | [SensorInformation(value=1, space=Discrete(3),... | [ActuatorInformation(value=5, space=Discrete(9... | [RewardInformation(value=[-100.], space=Box(lo... | -100.0 | False | 4 | AgentConductor-251a3b | Player 2 | 2 | Test | {'mode': 'test', 'worker': 1, 'episodes': 1} | d11b4a34-6507-4e4f-94fb-dcca264a7976 | 2 | Game of Tic-Tac-Toe | 1 | Tic-Tac-Toe |
| 1076 | 2025-04-26 21:39:52.536087 | {'tttenv': {'simtime_ticks': 24, 'simtime_time... | AgentConductor-d4d27e.Player 1-fbba4f | [SensorInformation(value=1, space=Discrete(3),... | [ActuatorInformation(value=8, space=Discrete(9... | [RewardInformation(value=[-100.], space=Box(lo... | -100.0 | False | 3 | AgentConductor-d4d27e | Player 1 | 2 | Test | {'mode': 'test', 'worker': 1, 'episodes': 1} | d11b4a34-6507-4e4f-94fb-dcca264a7976 | 2 | Game of Tic-Tac-Toe | 1 | Tic-Tac-Toe |
| 1077 | 2025-04-26 21:39:52.587534 | {'tttenv': {'simtime_ticks': 25, 'simtime_time... | AgentConductor-251a3b.Player 2-a9c664 | [SensorInformation(value=1, space=Discrete(3),... | [ActuatorInformation(value=2, space=Discrete(9... | [RewardInformation(value=[-100.], space=Box(lo... | -100.0 | False | 4 | AgentConductor-251a3b | Player 2 | 2 | Test | {'mode': 'test', 'worker': 1, 'episodes': 1} | d11b4a34-6507-4e4f-94fb-dcca264a7976 | 2 | Game of Tic-Tac-Toe | 1 | Tic-Tac-Toe |
| 1078 | 2025-04-26 21:39:52.618585 | {'tttenv': {'simtime_ticks': 26, 'simtime_time... | AgentConductor-d4d27e.Player 1-fbba4f | [SensorInformation(value=1, space=Discrete(3),... | [ActuatorInformation(value=8, space=Discrete(9... | [RewardInformation(value=[-100.], space=Box(lo... | -100.0 | False | 3 | AgentConductor-d4d27e | Player 1 | 2 | Test | {'mode': 'test', 'worker': 1, 'episodes': 1} | d11b4a34-6507-4e4f-94fb-dcca264a7976 | 2 | Game of Tic-Tac-Toe | 1 | Tic-Tac-Toe |
| 1079 | 2025-04-26 21:39:52.660326 | {'tttenv': {'simtime_ticks': 27, 'simtime_time... | AgentConductor-251a3b.Player 2-a9c664 | [SensorInformation(value=1, space=Discrete(3),... | [ActuatorInformation(value=0, space=Discrete(9... | [RewardInformation(value=[-100.], space=Box(lo... | -100.0 | False | 4 | AgentConductor-251a3b | Player 2 | 2 | Test | {'mode': 'test', 'worker': 1, 'episodes': 1} | d11b4a34-6507-4e4f-94fb-dcca264a7976 | 2 | Game of Tic-Tac-Toe | 1 | Tic-Tac-Toe |
| 1080 | 2025-04-26 21:39:52.692892 | {'tttenv': {'simtime_ticks': 28, 'simtime_time... | AgentConductor-d4d27e.Player 1-fbba4f | [SensorInformation(value=1, space=Discrete(3),... | [ActuatorInformation(value=5, space=Discrete(9... | [RewardInformation(value=[-100.], space=Box(lo... | -100.0 | False | 3 | AgentConductor-d4d27e | Player 1 | 2 | Test | {'mode': 'test', 'worker': 1, 'episodes': 1} | d11b4a34-6507-4e4f-94fb-dcca264a7976 | 2 | Game of Tic-Tac-Toe | 1 | Tic-Tac-Toe |
| 1081 | 2025-04-26 21:39:52.723946 | {'tttenv': {'simtime_ticks': 29, 'simtime_time... | AgentConductor-251a3b.Player 2-a9c664 | [SensorInformation(value=1, space=Discrete(3),... | [ActuatorInformation(value=0, space=Discrete(9... | [RewardInformation(value=[-100.], space=Box(lo... | -100.0 | False | 4 | AgentConductor-251a3b | Player 2 | 2 | Test | {'mode': 'test', 'worker': 1, 'episodes': 1} | d11b4a34-6507-4e4f-94fb-dcca264a7976 | 2 | Game of Tic-Tac-Toe | 1 | Tic-Tac-Toe |
| 1082 | 2025-04-26 21:39:52.754750 | {'tttenv': {'simtime_ticks': 30, 'simtime_time... | AgentConductor-d4d27e.Player 1-fbba4f | [SensorInformation(value=1, space=Discrete(3),... | [ActuatorInformation(value=5, space=Discrete(9... | [RewardInformation(value=[-100.], space=Box(lo... | -100.0 | False | 3 | AgentConductor-d4d27e | Player 1 | 2 | Test | {'mode': 'test', 'worker': 1, 'episodes': 1} | d11b4a34-6507-4e4f-94fb-dcca264a7976 | 2 | Game of Tic-Tac-Toe | 1 | Tic-Tac-Toe |
| 1083 | 2025-04-26 21:39:52.785736 | {'tttenv': {'simtime_ticks': 32, 'simtime_time... | AgentConductor-d4d27e.Player 1-fbba4f | [SensorInformation(value=1, space=Discrete(3),... | [ActuatorInformation(value=4, space=Discrete(9... | [RewardInformation(value=[10.], space=Box(low=... | 10.0 | True | 3 | AgentConductor-d4d27e | Player 1 | 2 | Test | {'mode': 'test', 'worker': 1, 'episodes': 1} | d11b4a34-6507-4e4f-94fb-dcca264a7976 | 2 | Game of Tic-Tac-Toe | 1 | Tic-Tac-Toe |
| 1084 | 2025-04-26 21:39:52.789901 | {'tttenv': {'simtime_ticks': 31, 'simtime_time... | AgentConductor-251a3b.Player 2-a9c664 | [SensorInformation(value=1, space=Discrete(3),... | [ActuatorInformation(value=6, space=Discrete(9... | [RewardInformation(value=[-100.], space=Box(lo... | -100.0 | True | 4 | AgentConductor-251a3b | Player 2 | 2 | Test | {'mode': 'test', 'worker': 1, 'episodes': 1} | d11b4a34-6507-4e4f-94fb-dcca264a7976 | 2 | Game of Tic-Tac-Toe | 1 | Tic-Tac-Toe |
| 1085 | 2025-04-26 21:39:52.827342 | {'tttenv': {'simtime_ticks': 33, 'simtime_time... | AgentConductor-d4d27e.Player 1-fbba4f | [SensorInformation(value=1, space=Discrete(3),... | [ActuatorInformation(value=0, space=Discrete(9... | [RewardInformation(value=[10.], space=Box(low=... | 10.0 | True | 3 | AgentConductor-d4d27e | Player 1 | 2 | Test | {'mode': 'test', 'worker': 1, 'episodes': 1} | d11b4a34-6507-4e4f-94fb-dcca264a7976 | 2 | Game of Tic-Tac-Toe | 1 | Tic-Tac-Toe |
| 1086 | 2025-04-26 21:39:52.828217 | {'tttenv': {'simtime_ticks': 33, 'simtime_time... | AgentConductor-251a3b.Player 2-a9c664 | [SensorInformation(value=1, space=Discrete(3),... | [ActuatorInformation(value=1, space=Discrete(9... | [RewardInformation(value=[-100.], space=Box(lo... | -100.0 | True | 4 | AgentConductor-251a3b | Player 2 | 2 | Test | {'mode': 'test', 'worker': 1, 'episodes': 1} | d11b4a34-6507-4e4f-94fb-dcca264a7976 | 2 | Game of Tic-Tac-Toe | 1 | Tic-Tac-Toe |
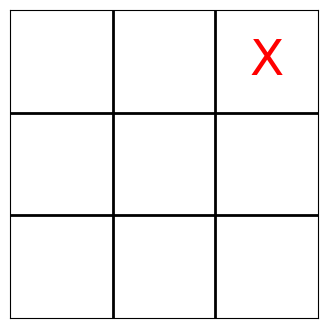
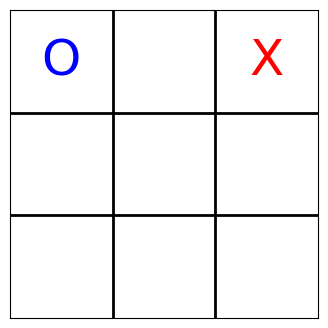
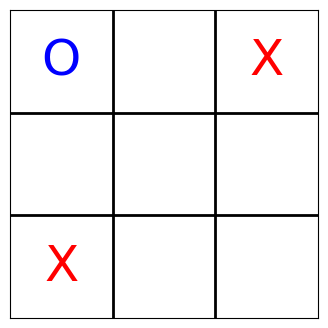
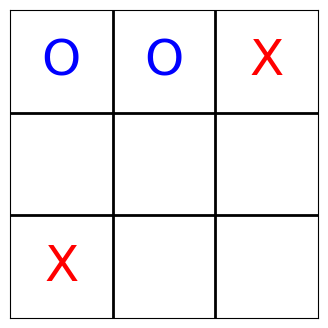
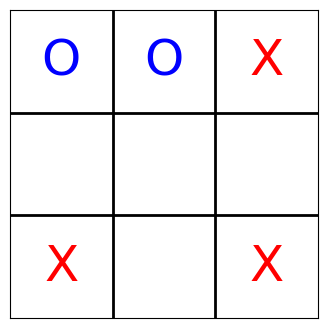
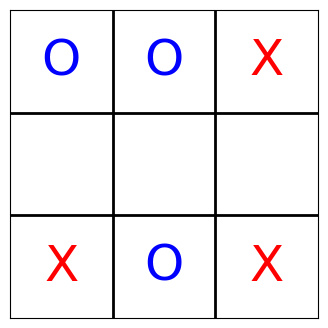
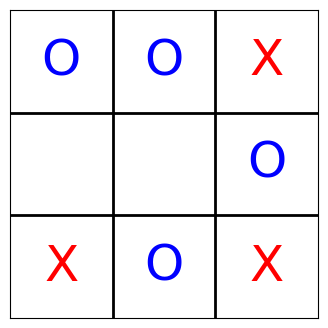
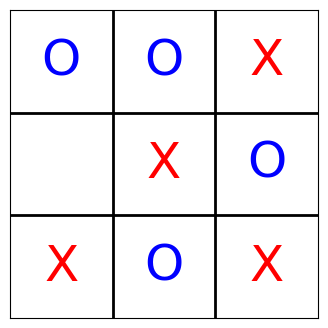
With the help of matplotlib, we can even visualize what the agents have done. The following function turns the state of the board into a matplotlib plot.
Note that the players still occasionally make invalid moves; for this quickstart tutorial, the number of training episodes is simply not big enough. So we simply filter those moves and present the condensed version, but the effect is that sometimes it appears is if a player was skipped: It wasn’t, it simply tried to place its mark at a position where another mark already existed.
[12]:
import matplotlib.pyplot as plt

def render_tic_tac_toe(board):
    fig, ax = plt.subplots(figsize=(4,4))
    # Draw grid lines
    for i in range(1, 3):
        ax.plot([i, i], [0, 3], color='black', linewidth=2)
        ax.plot([0, 3], [i, i], color='black', linewidth=2)
    # Place X and O
    for idx, val in enumerate(board):
        row, col = divmod(idx, 3)
        x = col + 0.5
        y = 2.5 - row
        if val == 1:
            ax.text(x, y, 'O', fontsize=36, ha='center', va='center', color='blue')
        elif val == 2:
            ax.text(x, y, 'X', fontsize=36, ha='center', va='center', color='red')
    ax.set_xlim(0, 3)
    ax.set_ylim(0, 3)
    ax.set_xticks([])
    ax.set_yticks([])
    ax.set_aspect('equal')
    plt.show()
Each agent’s sensor readings contain the complete board state. As the sensor readings are logged as part of the muscle_actions() query—which basically gives us trajectories—, we can iterate over all moves and render the Tic-Tac-Toe board now. Enjoy!
[13]:
board_states = list(
    ma[ma.muscle_action_objective > 0]
    .muscle_sensor_readings
    .apply(lambda x: [s.value for s in x])
)
for state in board_states:
    render_tic_tac_toe(state)

